
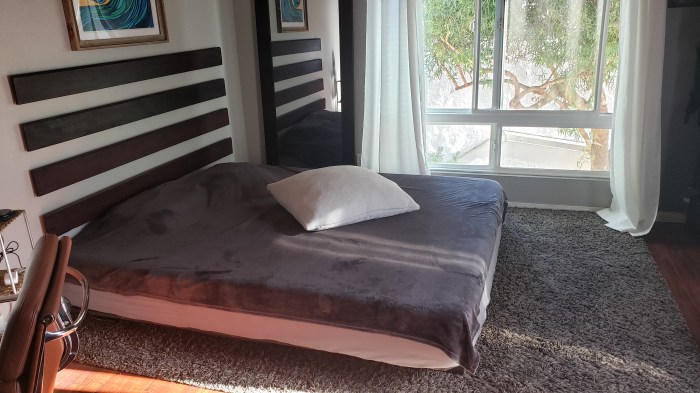
DIY – How to make a Floating Headboard
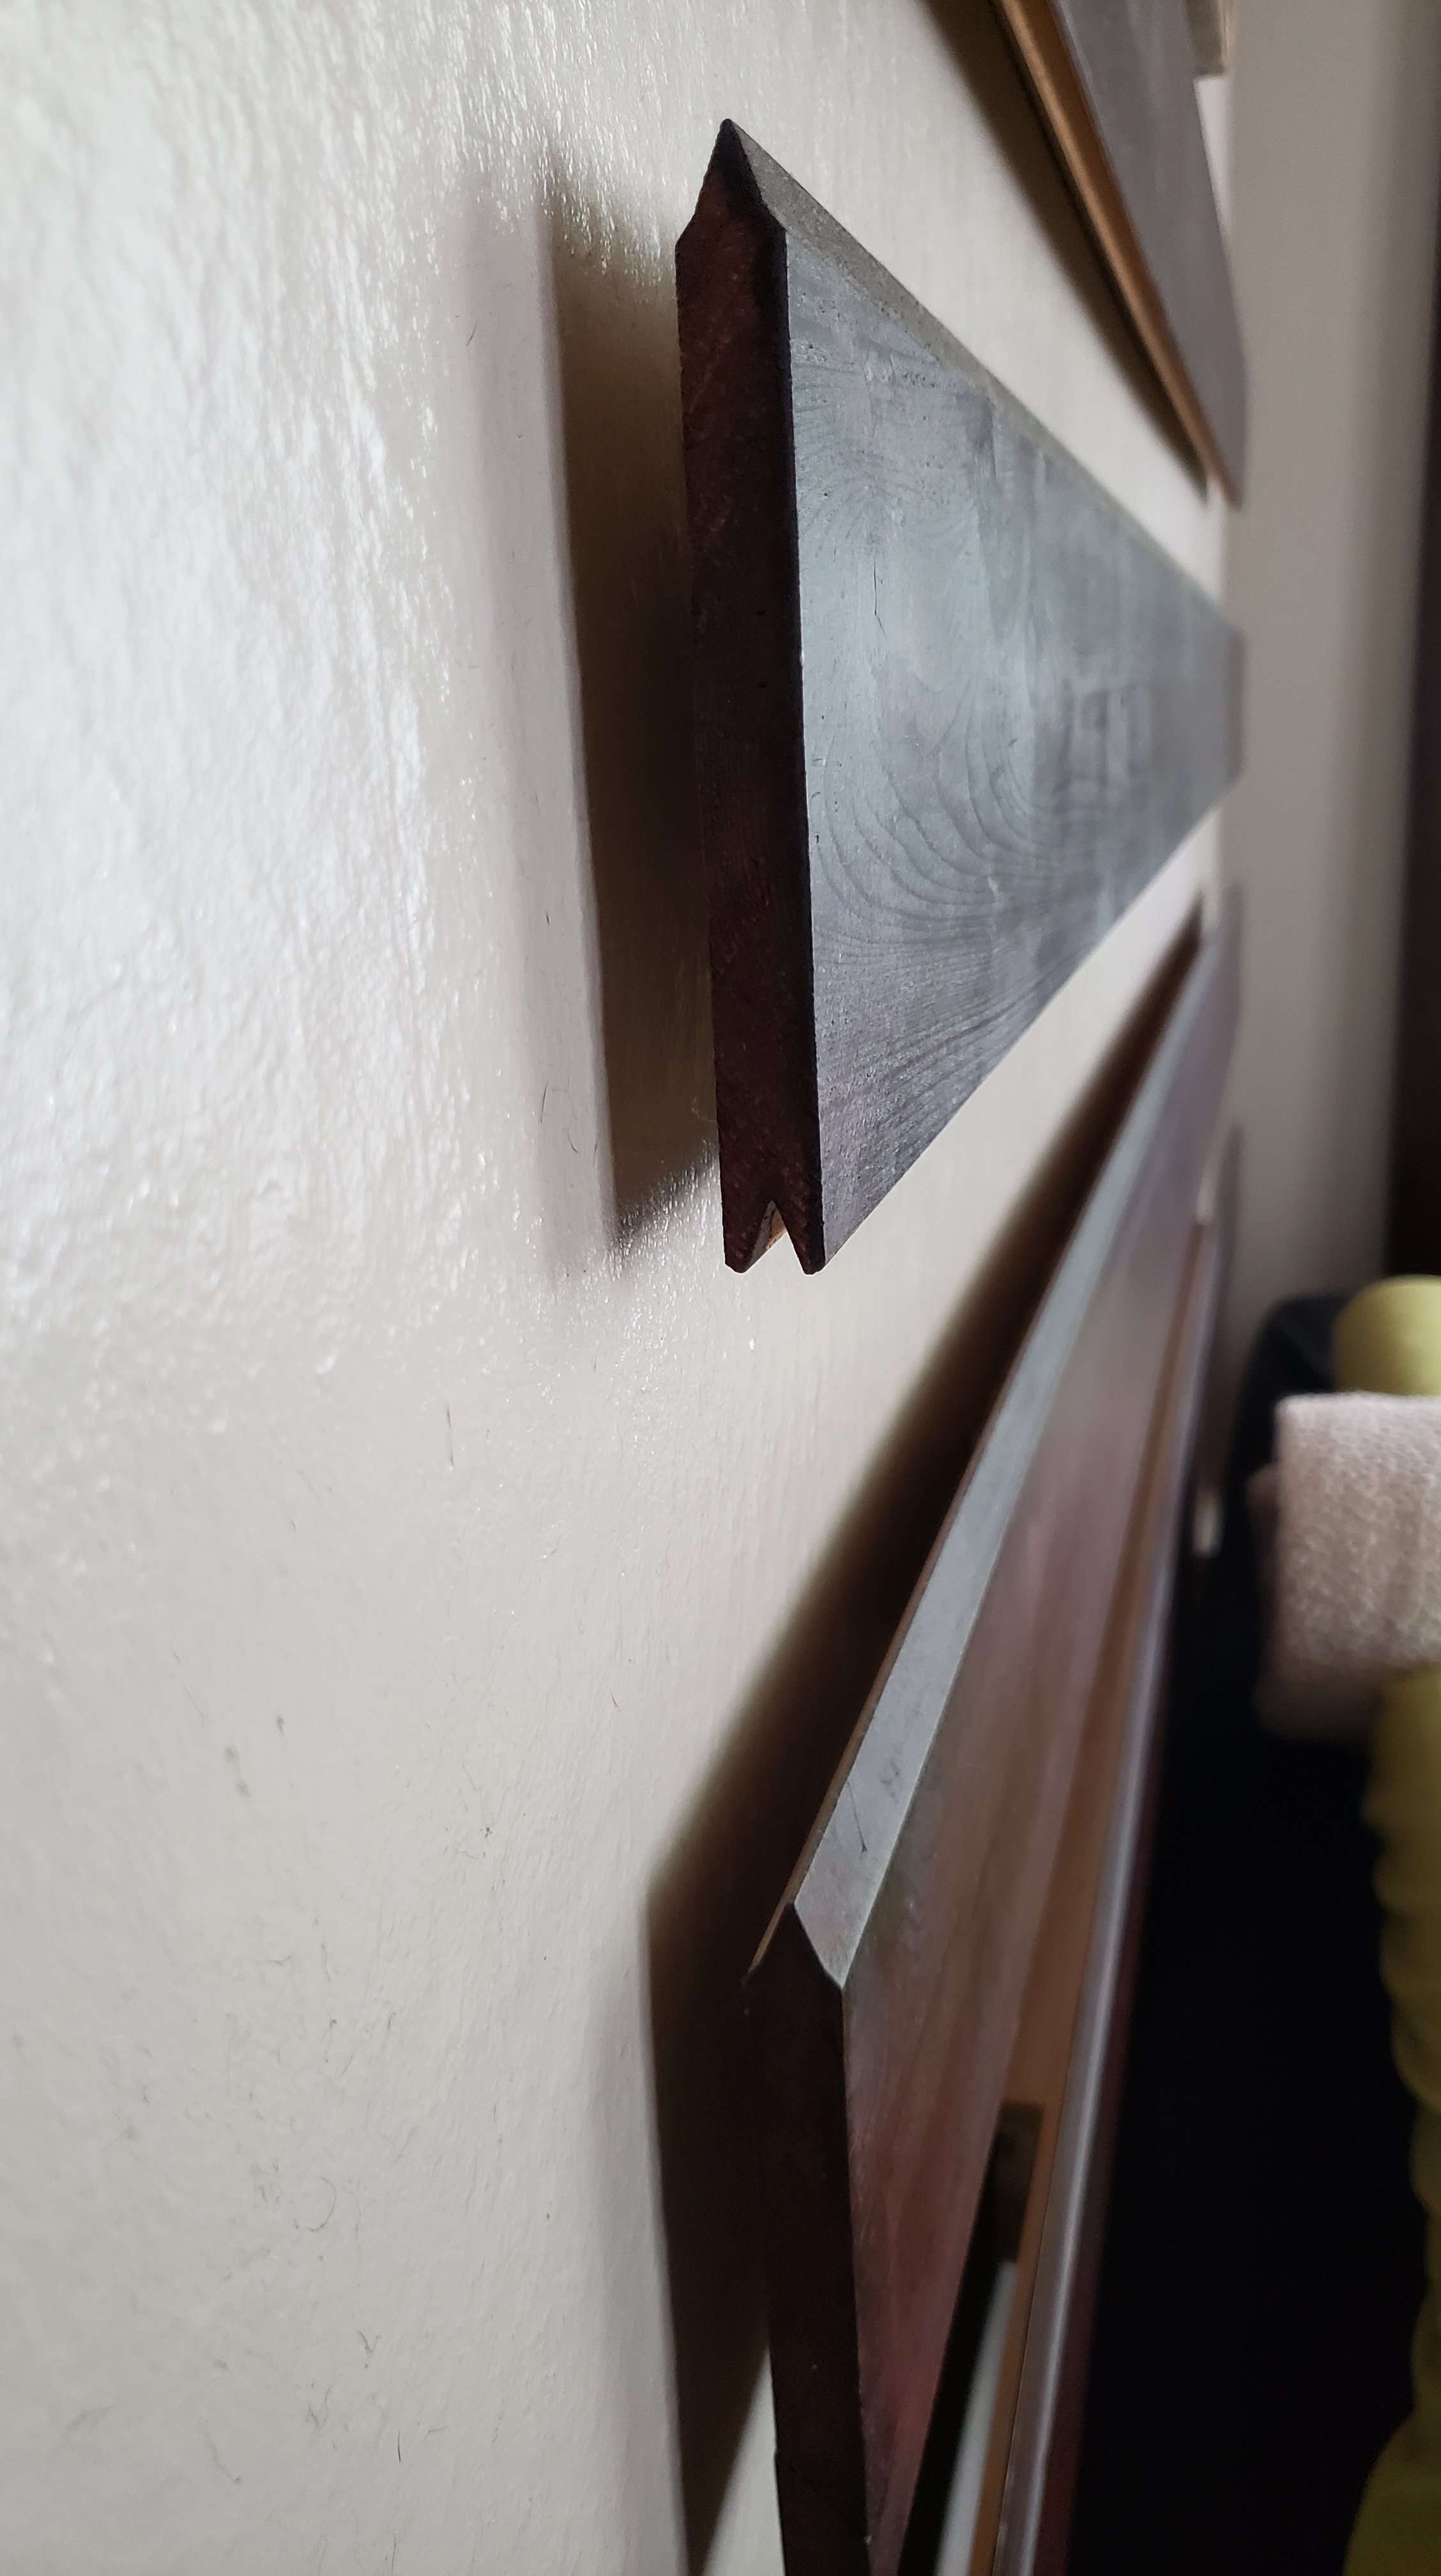
After watching DIY, I soon realized I could make a Floating Headboard by myself. It took a few hours, $60.00 in product, and simple math. It could of been cheaper, but I chose to get solid birch for the 1″ backing. This piece was glued behind the plank. I wanted them solid and flat.

What materials I used:
- (4) planks from Home Depot
- (4) 1″ wood piece to attach to the back of the planks to give the Floating look. (attached with Gorilla glue for Wood)
- (4) 2.5″ Nails (yes, I only used 4 nails right into the stud of the wall).
- Dark Stain with polyurethane. I used a sponge roller to apply the stain. No little back and forth, only long slow rolls…
- First I gorilla glued 1″ wood pieces to the back of the planks (this is the floating look).
- Second, I stained the planks.
- Third, I measured the wall and drew my layout making sure I used the stud on the wall.
- Fourth, I pre drilled the holes on the plank and the wall…
- Finally, I attached one by one and couldn’t believe how perfect it looked! Good Luck …..
DIY – How to make a Floating Headboard for Cheap and Easy